
Cloudbuster Prices: What You Are Actually Paying For
The Sticker Shock: Why do prices vary so wildly? If you have been looking for a Cloudbuster online,…

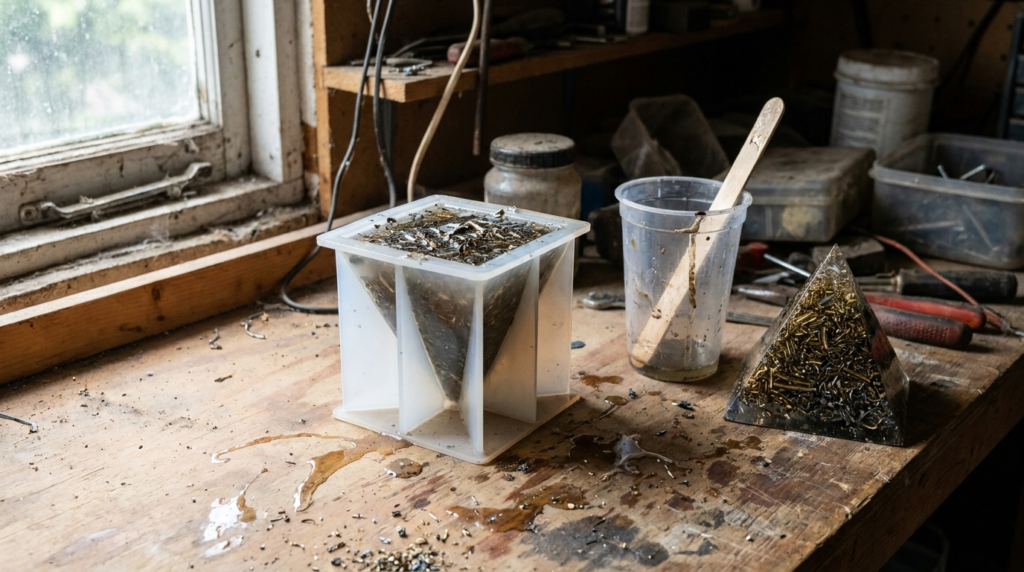
So, you have your mould sitting on the workbench and you are ready to pour. What now?
Making your own orgonite is a rewarding process. It makes you a co-experimenter in a worldwide movement. Of course, it can also be a sticky, frustrating mess if you skip the basics of resin casting.
We have been casting orgonite continuously for 24 years. In that time, we have ruined more moulds than I care to count. We have boiled resin, cracked pyramids, and permanently glued metal shavings to our workbenches. Let me save you some of that trouble.
If you have not actually chosen a mould yet, and are wondering whether to buy a pyramid or a simple muffin pan, stop reading this. Look instead at our guide on choosing an orgonite mould shape you will actually use. This article is for when the silicone is already on your desk and the resin is waiting to be opened.
Let us get the fundamental rule out of the way before we mix a single drop of resin.
Authentic orgonite is a 50/50 mixture of organic resin and inorganic metal shavings. It is not a decorative sprinkling of glitter in a sea of clear plastic. It is a dense, heavy, working matrix.
We must respect the lineage of this material. Wilhelm Reich discovered orgone energy and built the first accumulators and atmospheric cloudbusters. Decades later, Karl Hans Welz invented the material we call orgonite, discovering that a matrix of suspended metal and resin was highly active. Finally, Don Croft added quartz crystals to the mix and created the chembuster—which is a completely different device to Reich’s original cloudbuster—birthing the modern gifting movement.
We stick to Don Croft’s authentic 50/50 construction because it is what we know works in the field.
That 50/50 ratio is measured by volume, not by weight. Aluminium is light, while copper and steel are heavy. If you weigh them, your ratios will be completely wrong. A cup of loose metal shavings takes exactly one cup of mixed resin to fill the gaps between the metal. That is your target.
Clean your mould before you do anything else. A stray hair or a speck of dust in your silicone will become a permanent feature of your finished piece.
Wash reusable silicone moulds with warm soapy water, rinse them thoroughly, and let them dry completely. Moisture is the absolute enemy of curing resin. Even a single drop of water left in a corner will cause the resin to foam and cure into a cloudy, weak mess.
Next, level your workspace. I cannot stress this enough. Curing resin is a liquid and it will find the true horizon, regardless of what your table is doing. If your workbench is slanted, the base of your pyramid will be slanted. A wonky base means hours of miserable sanding later. Use a spirit level on your casting board before you pour.
Do you need a mould release spray? For a brand new, high-quality silicone mould, usually not. The silicone is naturally non-stick. However, a light mist of silicone release agent can extend the life of older moulds that are starting to lose their smooth finish.
How do you actually get the metal and resin into the mould?
In our experience, mixing the metal shavings into your resin pot before pouring is a terrible idea. It creates a heavy, unmanageable sludge. It traps massive amounts of air, refuses to pour cleanly, and makes a mess of your workspace.
Instead, we layer the materials directly in the mould.
First, pour a small amount of mixed resin into the very bottom of the mould. If you are making a pyramid, this ensures the tip is solid resin. Next, drop in your quartz crystal. Then, add a handful of metal shavings.
Pour more resin over the metal and let it sink in. Poke the metal gently with a wooden stick to help the liquid permeate the gaps. Add more metal, add more resin, and repeat this until the cavity is full.
Curing resin relies on an exothermic chemical reaction. It generates heat. A lot of heat.
If you pour a massive, deep block of orgonite all at once, the resin can undergo thermal runaway. It will boil, crack, smoke, and potentially melt your mould to the workbench. I have seen large pieces smoke like a chimney because the resin was poured too deeply.
For larger pieces, you must pour in stages. Pour an inch or two, let it heat up and cool down, and then pour the next layer. Yes, it takes patience. The alternative is a ruined casting and a workshop full of toxic fumes.
Always follow the resin manufacturer’s guidelines for maximum pour depth. Epoxy resins designed for deep pours cure slowly and generate less heat, while fast-curing polyester resins get incredibly hot very quickly.
Trapped air is the great frustration of resin casting. When you pack a mould with metal shavings, you create thousands of tiny pockets for air to hide.
How do you get them out?
First, pour slowly in a thin stream. This helps break surface bubbles before they enter the mould. Once the resin and metal are in, give the outside of the flexible silicone mould a gentle massage. This burps the larger bubbles up to the surface.
A wooden skewer is useful for teasing bubbles out of sharp internal corners. Do not use a metal tool for this. If you drag a metal screwdriver against the inside of your silicone mould, you will scratch it. Every single piece you cast from then on will feature a perfect replica of that scratch.
Patience is rare when you are waiting for orgonite to cure. You will be tempted to poke it to see if it is hard. Do not do this. You will leave a permanent fingerprint in the base.
Read your resin manufacturer’s instructions for demoulding time, and then add a few hours just to be safe. Pulling a piece out while it is still soft will warp it permanently.
When it is fully hard and has cooled down to room temperature, it is time to demould. Gently pull the edges of the silicone away from the resin to break the vacuum. Work your way around the entire perimeter. Then, push firmly from the bottom.
Do not yank the piece out by force. Silicone is flexible, but it will tear if you treat it with contempt. If a piece is genuinely stuck, a drop of soapy water worked down the side can sometimes break the suction.
How many pours will a silicone mould realistically give you?
In our daily production, a high-quality mould might survive twenty to thirty pulls before the surface degrades noticeably. The intense heat of the curing resin, combined with its chemical aggression, slowly destroys the silicone.
Your castings will go from glossy to dull. Eventually, the resin will begin to stick to the mould walls, and one day, the silicone will tear when you remove the piece. That mould is now dead. Cut your losses and replace it.
To get the most out of your equipment, store your moulds flat. Keep them away from direct sunlight, which degrades silicone quickly, and store them in a dust-free box. Never stack heavy objects on top of an empty mould, or it will warp out of shape permanently.
You will hear elaborate theories online attempting to explain how orgonite functions. People talk about the piezoelectric effect of the quartz squeezing in the resin, or scalar waves, or quantum physics, or negative ion conversion.
I do not buy into any of them. In my opinion, these are pseudo-scientific attempts to explain something that modern physics simply does not have a vocabulary for yet. We do not need to invent complex electrical mechanisms to justify our work.
We rely on the traditional Croft recipe, plain and simple, because we have seen it work for over two decades. The organic resin attracts the energy, the inorganic metal repels it, and the chaotic matrix creates a scrubbing action that restores stagnant energy to a healthy, flowing state.
Casting your own orgonite is a brilliant way to understand this material. It connects you to the process. However, it also requires space, protective gear, and a high tolerance for sticky surfaces.
Here is our DIY Info repository.
If you find yourself needing a dozen tower busters for a weekend mission, and you simply do not have the time or the space to cast them yourself, we can always do the heavy lifting for you. You can find our authentic, 50/50 orgonite ready to ship at our online shop.

Ready to experience orgonite for yourself?
Shop All Products → The Sticker Shock: Why do prices vary so wildly? If you have been looking for a Cloudbuster online,…

What does the TriField TF2 actually measure? I've lost count of how many times I've watched someone switch…

Why measure EMF at all? I remember the first time I got my hands on a decent EMF…
Georg's expedition reports, orgonite guides and community news — straight to your inbox.
Unsubscribe anytime.